Side Project - Youtube
영상의 목록을 보여주고 영상을 플레이하는 유튜브의 간단한 기능을 구현한 프로젝트
- Github -> https://github.com/hwayeon351/Youtube
GitHub - hwayeon351/Youtube
Contribute to hwayeon351/Youtube development by creating an account on GitHub.
github.com
학습 회고
오늘은 Youtube 앱 개발을 시작하였다.
유튜브 앱의 하단의 레이아웃을 보면 영상의 제목과 영상을 보여주는 작은 플레이어와 영상을 시작하고 중단하는 버튼 조작을 할 수 있다.
그리고 해당 레이아웃을 터치한 후 위로 드래그하면 영상의 크기가 커지게 되고 영상 하단에는 다른 영상 리스트를 살펴 볼 수 있다.
이렇게 모션에 따라 변화하는 레이아웃을 만드는 MotionLayout에 대해 공부하였다.
오늘 공부한 내용
- MotionLayout
MotionLayout은 앱에서 모션과 위젯의 애니메이션을 관리할 때 사용할 수 있는 레이아웃이다.
MotionLayout은 ConstraintLayout의 서브클래스이므로 ConstraintLayout의 다양한 레이아웃 기능을 사용할 수 있다.
레이아웃의 전환과 복잡한 모션 처리를 지원해서 애니메이션을 정의해서 시간 경과에 따라 객체 속성을 변경하는 속성 애니메이션 프레임워크와 TransitionManager, CoordinatorLayout의 혼합된 기능을 제공한다.
이러한 MotionLayout은 표현하고자 하는 애니메이션의 복잡도에 상관없이 XML로 모든 Transition을 정의할 수 있다.
1. MotionLayout을 담을 레이아웃 정의
유튜브 앱에서 홈화면을 보면 영상 리스트가 보이고 하단에 MotionLayout이 들어가고 최하단에 BottomNavigationView가 들어간다.
MotionLayout을 터치해 드래그해서 새로운 창을 띄우기 위해서 MotionLayout을 담을 레이아웃으로 FrameLayout을 사용하였다.
<?xml version="1.0" encoding="utf-8"?>
<androidx.constraintlayout.widget.ConstraintLayout xmlns:android="http://schemas.android.com/apk/res/android"
    xmlns:app="http://schemas.android.com/apk/res-auto"
    xmlns:tools="http://schemas.android.com/tools"
    android:layout_width="match_parent"
    android:layout_height="match_parent"
    tools:context=".MainActivity">

    <com.google.android.material.bottomnavigation.BottomNavigationView
        android:id="@+id/mainBottomNavigationView"
        android:layout_width="0dp"
        android:layout_height="wrap_content"
        app:layout_constraintBottom_toBottomOf="parent"
        app:layout_constraintEnd_toEndOf="parent"
        app:layout_constraintStart_toStartOf="parent"
        app:menu="@menu/bottom_nav_menu" />

    <androidx.recyclerview.widget.RecyclerView
        android:id="@+id/mainRecyclerView"
        android:layout_width="0dp"
        android:layout_height="0dp"
        app:layout_constraintBottom_toBottomOf="parent"
        app:layout_constraintEnd_toEndOf="parent"
        app:layout_constraintStart_toStartOf="parent"
        app:layout_constraintTop_toTopOf="parent" />

    <FrameLayout
        android:id="@+id/fragment_container"
        android:layout_width="0dp"
        android:layout_height="0dp"
        app:layout_constraintBottom_toBottomOf="parent"
        app:layout_constraintEnd_toEndOf="parent"
        app:layout_constraintStart_toStartOf="parent"
        app:layout_constraintTop_toTopOf="parent" />


</androidx.constraintlayout.widget.ConstraintLayout>
2. MotionLayout 파일 만들기
FrameLayout에 담을 MotionLayout을 정의한다.
MotionLayout은 ConstraintLayout의 서브클래스이다.
따라서 ConstraintLayout을 최상단 레이아웃으로 정의해서 내부에 담을 View들을 배치하고 이후 MotionLayout으로 변경하면 <androidx.constraintlayout.motion.widget.MotionLayout .../>
로 최상단 레이아웃이 바뀐다.
MotionLayout을 구성하는 View는 플레이어를 컨트롤할 버튼 역할을 하는 ImageView, 플레이어를 보여줄 PlayerView를 일단 임시로 ImageView로 대체하여 위치를 잡아주었다. 그리고 영상의 제목을 담기 위해 TextView를 구성했다.
MotionLayout이 확장되면 영상이 화면의 상단에 차지하게 되고 플레이어 컨트롤 버튼과 영상의 제목을 담는 TextView, 그리고 그 옆의 PlayerView는 숨게된다.
따라서, 이를 고려해서 View의 위치들을 잡아준다.
<?xml version="1.0" encoding="utf-8"?>
<androidx.constraintlayout.motion.widget.MotionLayout xmlns:android="http://schemas.android.com/apk/res/android"
    xmlns:app="http://schemas.android.com/apk/res-auto"
    android:layout_width="match_parent"
    android:layout_height="match_parent"
    app:layoutDescription="@xml/fragment_player_scene">

    <androidx.constraintlayout.widget.ConstraintLayout
        android:id="@+id/mainContainerLayout"
        android:layout_width="0dp"
        android:layout_height="250dp"
        android:background="@color/purple_200"
        app:layout_constraintEnd_toEndOf="parent"
        app:layout_constraintStart_toStartOf="parent"
        app:layout_constraintTop_toTopOf="parent" />

    <ImageView
        android:id="@+id/bottomPlayerControlButton"
        android:layout_width="wrap_content"
        android:layout_height="wrap_content"
        android:layout_marginEnd="24dp"
        app:layout_constraintBottom_toBottomOf="@id/mainContainerLayout"
        app:layout_constraintEnd_toEndOf="@id/mainContainerLayout"
        app:layout_constraintTop_toTopOf="@id/mainContainerLayout" />

    <ImageView
        android:id="@+id/playerView"
        android:layout_width="0dp"
        android:layout_height="0dp"
        app:layout_constraintBottom_toBottomOf="@id/mainContainerLayout"
        app:layout_constraintStart_toStartOf="@id/mainContainerLayout"
        app:layout_constraintTop_toTopOf="@id/mainContainerLayout" />

    <TextView
        android:id="@+id/bottomTitleTextView"
        android:layout_width="0dp"
        android:layout_height="wrap_content"
        android:layout_marginStart="8dp"
        android:layout_marginEnd="12dp"
        android:ellipsize="end"
        android:maxLines="1"
        android:singleLine="true"
        app:layout_constraintBottom_toBottomOf="@id/bottomPlayerControlButton"
        app:layout_constraintEnd_toStartOf="@id/bottomPlayerControlButton"
        app:layout_constraintStart_toEndOf="@id/playerView"
        app:layout_constraintTop_toTopOf="@id/bottomPlayerControlButton" />

    <androidx.recyclerview.widget.RecyclerView
        android:id="@+id/fragmentRecyclerView"
        android:layout_width="0dp"
        android:layout_height="0dp"
        android:background="@color/white"
        app:layout_constraintBottom_toBottomOf="parent"
        app:layout_constraintEnd_toEndOf="parent"
        app:layout_constraintStart_toStartOf="parent"
        app:layout_constraintTop_toBottomOf="@id/mainContainerLayout" />

</androidx.constraintlayout.motion.widget.MotionLayout>
3. MotionScene 만들기
2.에서 만든 fragment_player 파일을 MotionLayout으로 만들기 위해 우측 상단에 Design 탭을 클릭한다.

그리고 Component Tree의 최상단 레이아웃인 ConstraintLayout에 우 클릭을 하면 MotionLayout으로 바꿀 수 있다.
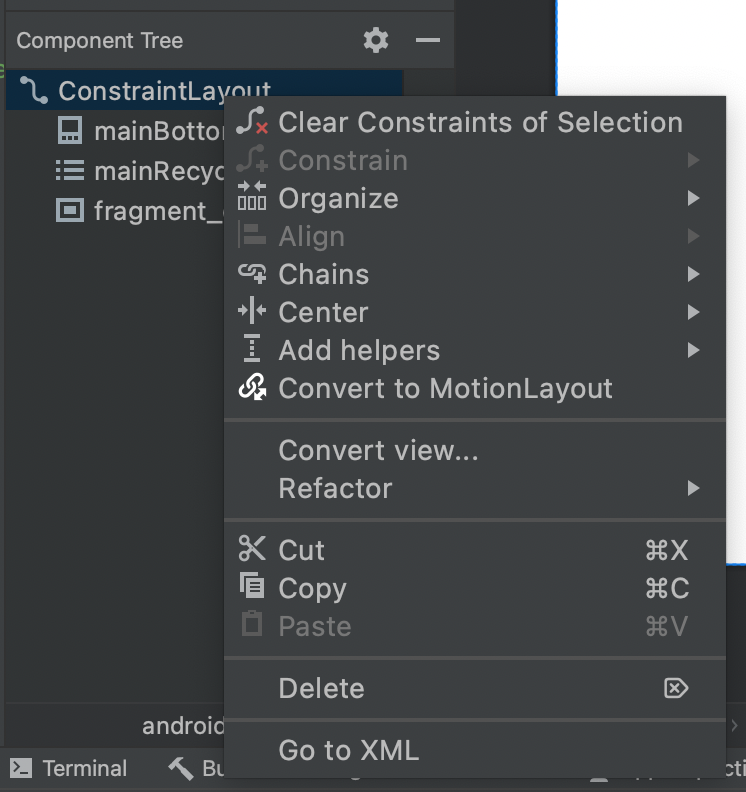
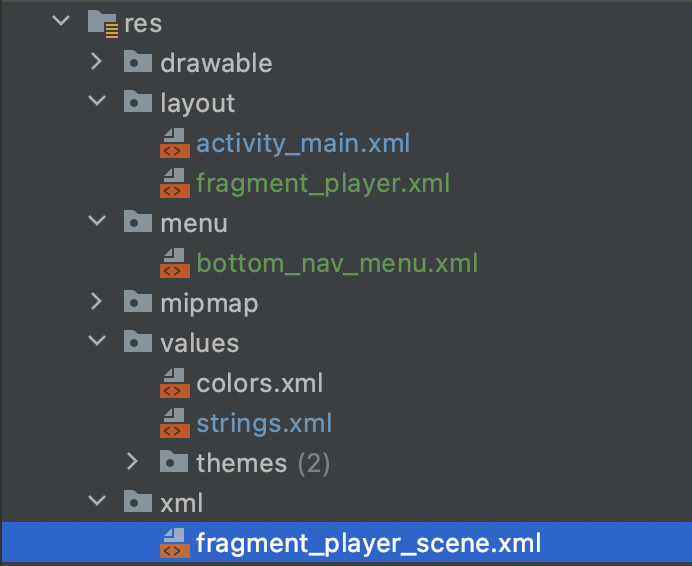
그러면 res 폴더 하위에 xml 폴더가 생기고 해당 폴더에 fragment_player_scene이라는 파일이 별도로 생성된다.
<?xml version="1.0" encoding="utf-8"?>
<MotionScene
    xmlns:android="http://schemas.android.com/apk/res/android"
    xmlns:motion="http://schemas.android.com/apk/res-auto">

    <Transition
        motion:constraintSetEnd="@+id/end"
        motion:constraintSetStart="@id/start"
        motion:duration="1000">
       <KeyFrameSet>
       </KeyFrameSet>
    </Transition>

    <ConstraintSet android:id="@+id/start">
    </ConstraintSet>

    <ConstraintSet android:id="@+id/end">
    </ConstraintSet>
</MotionScene>
그리고 fragment_player 파일의 최상단 레이아웃이 MotionLayout으로 변경되고, app:layoutDescription 속성이 추가되어 fragment_player_scene을 참조한다.
<?xml version="1.0" encoding="utf-8"?>
<androidx.constraintlayout.motion.widget.MotionLayout xmlns:android="http://schemas.android.com/apk/res/android"
    xmlns:app="http://schemas.android.com/apk/res-auto"
    android:layout_width="match_parent"
    android:layout_height="match_parent"
    app:layoutDescription="@xml/fragment_player_scene">
fragment_player_scene은 fragment_player의 모든 모션에 관한 설명을 포함하는 xml 리소스 파일이다.
레이아웃 정보를 모션에 관한 설명과 별도로 가지고 있기 위해서 MotionLayout은 MotionScene을 참조한다.
'Android > Side Projects' 카테고리의 다른 글
| Youtube 앱 개발하기 (0) | 2022.03.03 |
|---|---|
| Youtube 앱 개발하기 (0) | 2022.03.01 |
| 당근 마켓 앱 개발하기 (0) | 2022.02.27 |
| Airbnb 앱 개발하기 (0) | 2022.02.26 |
| Airbnb 앱 개발하기 (0) | 2022.02.25 |